Every home has one. It’s the dark, terrifying abyss lurking beneath the sink.
You know the one I’m talking about. You open the cabinet door gently—hoping for the best—and are immediately greeted by a sliding avalanche of plastic bags, two rogue sponges, and a bottle of bleach that falls over if you so much as breathe on it.
Somewhere in the back, behind the U-bend pipe, there’s probably a bottle of specialist granite cleaner you bought in 2019. You would absolutely use it, if only you could reach it without dislocating your shoulder or knocking over a tower of dishwasher tablets.
Here’s the thing: under sink storage space is actually some of the most valuable “prime real estate” in your kitchen or bathroom. It’s deep, it’s hidden, and it’s right where you need it. But because of those pesky pipes and the lack of built-in shelves, it usually becomes a graveyard for cleaning supplies.
If you can get this one cupboard under control, the whole room feels calmer.
The good news? You don’t need a carpenter to build custom drawers, and you don’t need a Pinterest-perfect pantry system that costs a fortune. You just need smarter, realistic under sink storage ideas that work around the plumbing—not against it.
Here’s a practical, non-judgy guide to turning that “cupboard of doom” into something you can actually open without fear.
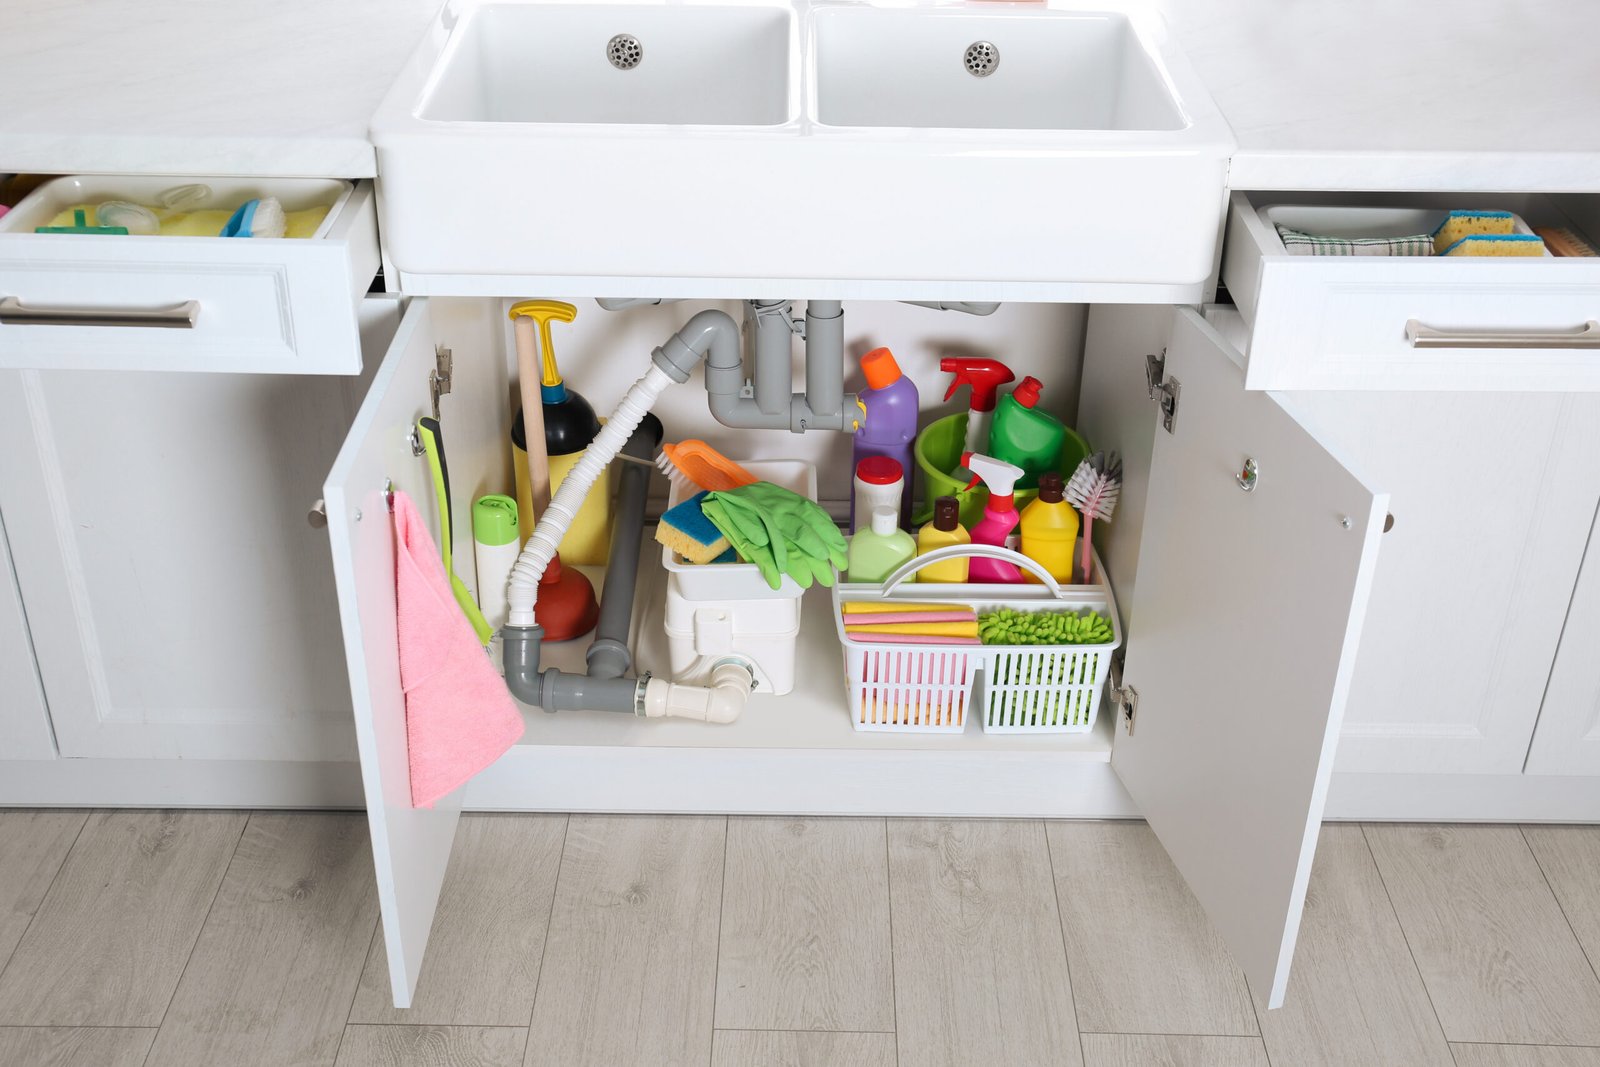
Step 1: The “Archaeological Dig” (Clear It Out)
Before you buy a single acrylic bin or tension rod, you have to face the music. You need to see what’s actually in there.
This is the “It gets worse before it gets better” phase.
Empty it completely. Pull every single bottle, cloth, and bag out and put them on the kitchen floor.
Wipe it down. This cupboard collects a lot of dust and grime. Give the base a good scrub. (Check for leaks while you’re down there—damp wood is a common under-sink surprise.)
Now, look at the pile on your floor.
Be ruthless. Under-sink storage is tight; you don’t have the luxury of hoarding.
The “Graveyard” Items: That bottle of eco-cleaner you bought two years ago, tried once, hated the smell of, but felt too guilty to throw away? Toss it.
The Duplicates: Do you really need four open bottles of washing-up liquid? Consolidate them into one bottle.
The “Why is this here?” Items: Why is there a hammer next to the sponges? Why is there a dead lightbulb? Move them to their actual homes.
You want this space to hold the things you use to keep your house clean—not the things that make your house messy.
Step 2: Define the Cupboard’s Job Description
Part of the reason this space gets messy is because we treat it like a junk drawer. It tries to be a cleaning cupboard, bin zone, plastic bag holder, pet food station and tool shed all at once.
It cannot be all those things.
Pick one primary purpose, and maybe one secondary purpose.
For the Kitchen Sink:
Its job is “Daily Cleaning + Trash.” It holds bin bags, dishwasher tabs, dish soap, and the counter spray you reach for constantly. It does not hold the bulk pack of paper towels or the oven cleaner you use once a year.
For the Bathroom Sink:
Its job is “Daily Hygiene + Quick Clean.” It holds toilet roll backups, toothpaste backups and one bottle of bathroom spray.
If an item doesn’t fit the job description, evict it. This single decision makes the entire organisation process 50% easier.
Step 3: Make Peace with the Pipes
The villain of this story is the plumbing. The U-bend pipe that dips down in the middle of the cabinet makes traditional shelving impossible.
Most people try to ignore the pipes and just shove things around them. That’s a mistake. You need to plan around the plumbing.
Look at the negative space you can actually use:
- The Wings: tall space on the left and right
- The Floor: the flat base of the cupboard
- The Air: the height above the items but below the sink basin
Golden Rule: Measure before you buy anything.
There is nothing more heartbreaking than discovering your new under sink storage drawers are half an inch too tall to slot under the U-bend.
Step 4: The Magic of “Pull-Out” Storage
The number one rule of deep cupboards is simple: if you can’t see it, you won’t use it.
If you have to crawl inside the cupboard just to get a new sponge, you’re going to give up and start leaving things on the counter. That’s how clutter creeps back.
The solution: bring the back of the cupboard to you.
Sliding Drawers: Great for small, loose items—dishwasher tabs, sponges, cloths.
Wheeled Caddies: If drawers don’t fit, use a long, narrow bin with wheels or felt pads so it slides out smoothly.
Lazy Susan: Perfect for awkward corner gaps. One spin and the bottle at the back becomes instantly accessible.
These create a mini filing system for your cleaning supplies.
Step 5: Zone Your Supplies (Stop the Jumble)
Categories are everything. When you throw items together, bottles topple like dominoes.
Use bins or baskets to create simple zones:
The “Wet” Zone: Sprays, soaps, liquids—keep these in a plastic bin to contain leaks.
The “Tool” Zone: Sponges, scrub brushes, steel wool, old toothbrushes for grout.
The “Refill” Zone: Bin bags, dishwasher tabs, refill bottles.
When you open the door, you want to see categories, not chaos. Ideally, each zone should be liftable—grab the “spray bin,” clean the kitchen, put it back.
Step 6: Use the Doors (The Secret Weapon)
The inside of your cabinet doors is free real estate.
Use it for the little items that always disappear:
- Command hooks for drying gloves or hanging dusters
- A small adhesive caddy for sink stoppers or sponges
- A plastic bag dispenser mounted to the door
Keep door-mounted items light so you don’t strain the hinges.
Step 7: Go Vertical (Use the Air)
Most under-sink cupboards waste a ton of vertical space.
Shelf Risers: Place a small riser on one side of the cabinet to create two usable levels.
Stackable Bins: Use clear bins with front openings—easy access without unstacking.
Tension Rod Hack: Install a small tension rod and hang spray bottles from their triggers. This uses “dead air” space perfectly.
Step 8: The “Prime Real Estate” Rule
Not all items deserve front-row seats.
Daily Essentials: washing-up liquid, bin bags, surface spray.
Back Row: refills, bulk buys, speciality cleaners you use twice a year.
A simple lift-out caddy makes this seamless: grab, clean, put back.
Step 9: Tame the “Bag of Bags”
Carrier bags will multiply unless you contain them.
- Use a bag dispenser
- Set a limit (when the dispenser is full, stop keeping extras)
- For Type-A satisfaction: fold bags into triangles—tiny, neat, oddly soothing
Step 10: The 60-Second Weekly Reset
This space will drift. That’s normal.
Once a week—maybe when you take the bins out—kneel down and:
- Stand bottles upright
- Put stray sponges back
- Check the bag situation
- Ensure nothing is leaking or damp
Sixty seconds prevents ever returning to the “Stage 1 Archaeological Dig.”
Common Mistakes to Avoid
Opaque Containers: You can’t see what’s inside, so you rebuy things unnecessarily.
Storing Chemicals Low: Add a child-lock if you have kids or visiting kids.
Ignoring Damp: Musty smell = inspect immediately. Use shelf liners to protect wood.
If visual clutter elsewhere in your home is stressing you out too, these cable organisation ideas help create the same calming effect in other rooms.
Final Thoughts
Your under-sink cupboard doesn’t have to be the shame of your kitchen.
It’s a tiny space, which makes it a fast win. You can sort it in a single morning, and next time you reach for a bin bag and it slides out neatly from its own spot? You’ll get that tiny, satisfying spark of “I actually have my life together.”
Start small. Measure around the pipes. Clear the floor. You’ve got this.
P.S. If you liked this, you might also enjoy my guide on organising a small bedroom — it pairs perfectly with this one.
4 thoughts on “Under Sink Storage Ideas To Finally Tame That Cupboard Of Doom”